The device described in this document is proprietary. You were given this information so that you can attempt to verify the theory which this device seems to demonstrate. Please keep this information confidential; do not discuss it with anyone.
Experimenters have noted that the m-state materials "like" confined spaces. Water, with concentrated m-state elements dissolved in it, also seems to be lighter but more massive and more viscous than empty water. The magnetic separator or trap is designed to concentrate these m-state elements and take advantage of the properties above to store them in the tight spaces provided by the polyfill packing material.
According to a theory developed by the inventor of the magnetic trap, different m-state elements may have different magnetic repulsion characteristics. This might allow us to design traps which will separate the different m-state elements.
For this trap we theoretically want a high swirl rate with low exit pressure in order to catch as much of the m-state elements as possible in the outflow filter and to allow as much m-state as possible to drop to the bottom.
1 - 16 quart stock pot
1 - 12 quart stock pot
1 - 8 quart stock pot
We recommend using cheap stainless steel stock posts since they are more likely to be attracted to a magnet. The stainless steel pots must be able to hold a magnet stuck to their surface.
Misc:
2 - 1/2 inch X 1 inch X 12 inch pieces of plastic
1 - package of polyfill (like the material used to stuff pillows)
3 - clothespins and a toothpick
Inlet assembly:
1 - plastic or brass 3/8 inch hose barb to ½ inch male pipe thread
adapter
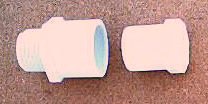
2 - ½ inch PVC female pipe thread to female pipe thread coupler
1 - ½ inch PVC threaded close nipple
1 - ½ inch PVC to male pipe thread adapter
1 - ½ inch PVC unthreaded pipe plug
2 - 1 1/8 inch X 13/16 inch X 1/8 inch #16 O-rings
Magnet assemblies:
2 - 24 to 36 ounce or larger (larger is better) round speaker magnets
with an approximate 1¼ inch diameter inside hole. One of the
magnets should be larger than the other. These can be removed from damaged
speakers with a hammer and chisel.
1 - tube of silicon rubber sealer
2 - 2 inch X 1 inch PVC reducers
1 - 2 inch PVC coupler
PVC solvent/glue
1 - 1½ inches of 1 inch PVC pipe
1 - 12 inch X 12 inch piece of ¼ inch thick clear acrylic sheet
Remove the handles on the two smaller stock pots. This can be done by drilling or grinding the rivets that hold the handles on. These handles are usually held on using aluminum rivets.
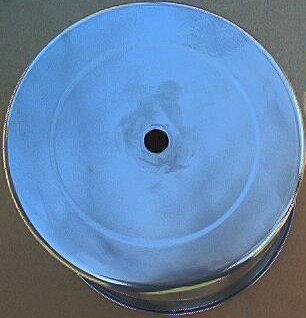
Drill or cut a ¾ inch hole in the exact center of the bottom of the mid sized (12 inch) stock pot.
Inlet assembly:
The inlet assembly is constructed from the PVC pipe parts and the O rings. Insert the close nipple into the hole in the center of the bottom of the mid sized (12 inch) stock pot and put both O rings on the nipple from each side. One of the PVC threaded couplers threads onto the part of the nipple projecting from the outside of the stock pot and the other threads onto the inside. The portion of this assembly which passes through the lid should be tightened with wrenches. You should use Teflon tape on these joints if you wish to take them apart later.
The plastic or brass ½ inch thread to 3/8 inch hose barb screws into the threaded coupler on the outside of the 12 inch stock pot. When you are ready to use the magnetic trap, you can attach a piece of vinyl tubing between this hose barb and your water source.
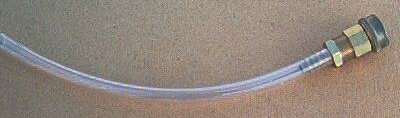
Vinyl tubing, hose barb and hose coupler
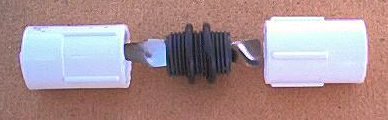
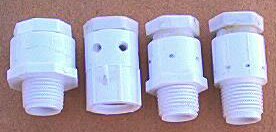
Nozzle:
You build the nozzle portion of the inlet assembly by pushing the ½ inch male plug into the unthreaded end of the ½ inch PVC to male pipe thread adapter. Then you pound this plug into the adapter with the threaded end of the adapter against a block of wood so it will not be damaged.
Nozzel parts
Drill four to six 1/8 or 1/16 inch holes through the side of the adapter into the center of the plug so that the holes enter the center of the plug at a tangent to the circumference of the space inside the plug. In other words, we want the water to come out the side of the inlet assembly in such a way as to create a pinwheel effect which will move the water in the trap in a circular motion parallel to the bottom of the inner stock pot about midway between the magnets.
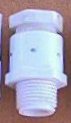
Finished nozzel assembly
The PVC pipe to male thread adapter screws into the threaded coupler projecting from the inside of the 12 inch stock pot. This male pipe thread adapter can be threaded into the female coupler hand tight as this will allow you to experiment with different nozzles to swirl the water inside the trap.
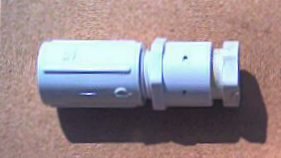
Nozzle assembly and coupler
Magnet assemblies:
The two speaker magnet assemblies from discarded speakers must be disassembled. These magnet assemblies consist of two steel plates glued to the top and bottom of the donut shaped magnet. While you can break these steel plates loose from the magnet with the hammer and chisel, you run a great risk of breaking the magnet in the process. If you first heat the metal plates on a burner, the glue will soften and it will be quite easy to separate the metal plate from the magnet. Apply heat to the steel plate, not directly to the magnet. Be careful not to apply too much heat for too long; heat can weaken a magnet. The lower magnet should be smaller than the upper magnet.
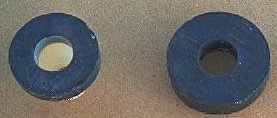
Lower and upper magnets
Upper magnet assembly:
After you have separated the speaker magnets from the metal plates
they must be coated with silicon sealer and set to dry. When the magnets
are dry you can attach the larger of them to the inside of the 12 inch
stock pot so that the nozzle assembly protrudes through the center of the
magnet. Since the stock pots are made of cheap stainless steel, the magnet
will probably hold itself to the bottom inside of the 12 quart stock pot
quite nicely. This magnetic attachment method will also allow you to experiment
with the orientation of the magnet. We believe that the two magnets should
be mounted so that they attract each other but this is not totally confirmed.
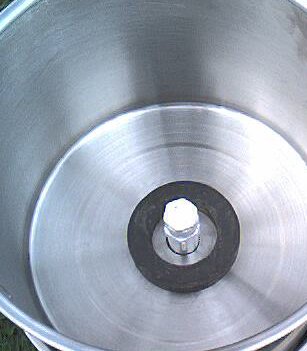
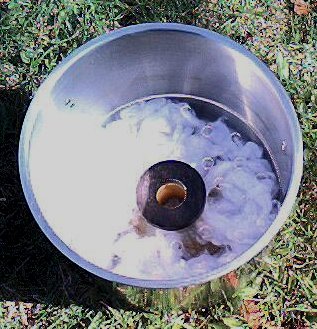
12 quart stock pot with upper magnet and nozzle assembly
Lower magnet assembly:
The bottom magnet will be suspended on a pedestal which is centered
in the bottom of the 8 inch pot so that the top of this magnet is about
four to five inches away from the bottom of the upper magnet. This magnet
must be isolated from contact with the walls and bottom of the inner-most
8 quart stock pot. It will be supported on a PVC pedestal.
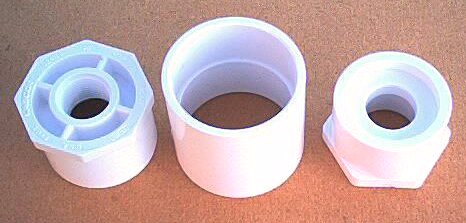
Pedestal parts
Pedestal assembly:
Trim ½ inch off each end of the 2 inch PVC coupler. Trim
both 2 inch to 1 inch PVC reducers so that they are 1 inch thick. Glue
each reducer into an end of the 2 inch PVC coupler.
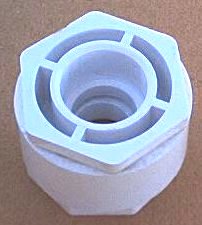
Completed pedestal assembly
Acrylic disk:
Take the 12 inch square of clear acrylic and determine the center of
the large surface.(This is easily done by determining where lines drawn
from opposing corners intersect.) Drill an 1/8 inch pilot hole through
the center point which you have just determined. Using this hole as a pivot,
scribe a circle on the acrylic square which is slightly smaller in diameter
than the inside diameter of the 8 quart stock pot. Using the coping saw
or a sabre saw, cut the acrylic square into a circle using the scribed
line as a guide. Using the pilot hole in the acrylic circle as a guide,
cut a hole in the center using the 1½ inch hole saw. Drill a bunch
of half inch holes at random points spaced about an inch apart across the
rest of the acrylic circle as illustrated in the image below.
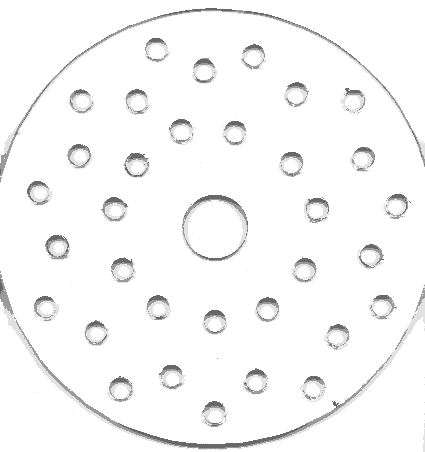
Acrylic disk hole plan
Take the 1½ inch piece of 1 inch PVC pipe and cut a single slot half way down one side using the hack saw. Cut two slots half way down from the other end oriented so that they don't intersect the single slot from the other end. Insert this piece of pipe into the center hole of the acrylic circle. Put the center hole of the smaller magnet over the two slot end of the pipe section. If it fits snugly, the magnet should be glued (using silicon sealer) to the short piece of 1 inch pipe.
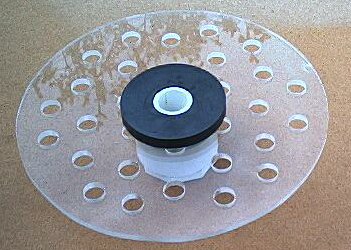
Magnet, acrylic disk and pipe section
Slip the single slot end into one end of the pedestal assembly. This fit should not be so tight as these two pieces will be separated every time the trap is used. This completes the construction of the lower magnet assembly.
Check the fit of this completed assembly. It should slip easily into the 8 quart stock pot. Glue the bottom of this assembly to the inside bottom of the 8 quart stock pot using the silicon sealer. The acrylic circle should keep the pedestal centered while the silicon hardens. Allow the silicon to set for 8 hours.
Lower magnet assembly, acrylic disk and pedestal inside 12 inch pot
X-shaped spacer:
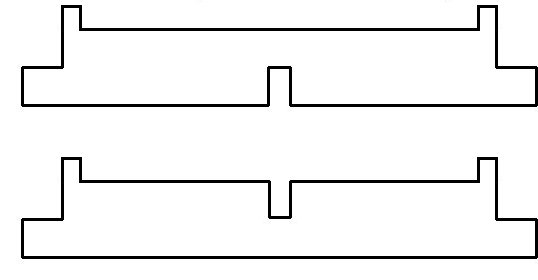
You will need an x-shaped spacer to keep the inner 8 quart stock pot from resting on the bottom of the outer 16 quart stock pot. You can build this by cutting two half inch thick pieces of acrylic or other plastic 1 inch wide by 16 inches long with a half inch deep notch out of both top corners of each end of them and a centered notch so that they can be assembled in a cross shape. These pieces will look somewhat like this:
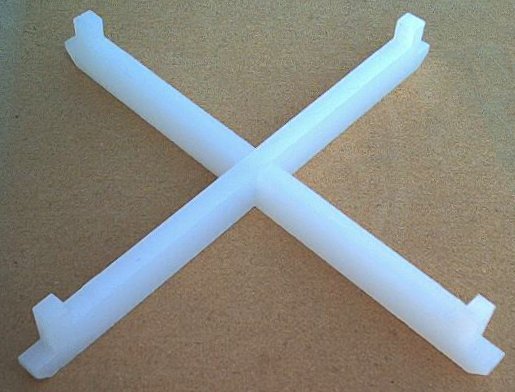
Assembled x-shaped spacer
Final assembly
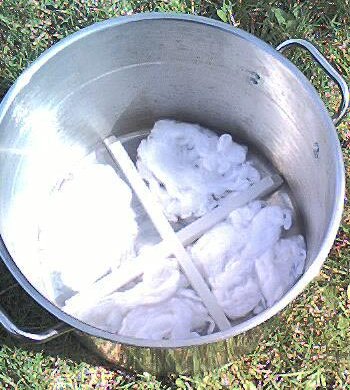
After the silicon sealer has fully cured, lift the lower magnet and acrylic disk up from the pedestal assembly. Loosly fill the inner 8 quart stock pot around the pedestal assembly with some polyfill or similar material up to about the top of the pedestal assembly and replace the magnet and acrylic disk.
Polyfill beneath magnet and acrylic circle
The 16 quart stock pot rests on it's bottom. Place the x-shaped spacer in the bottom of the 16 quart stock pot. Put some polyfill between the arms of the x-shaped spacer.
Polyfill between arms of x-shaped spacer
Center the 8 quart stock pot upright inside the 16 quart stock pot.
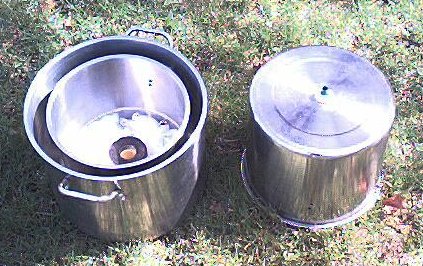
Ready for final assembly
Invert the 12 quart stock pot and slip it down between the 8 and 16 quart stock pots. The x shaped spacer will center the inverted 12 quart pot so that it's open end is one half inch above the bottom of the 16 quart pot.
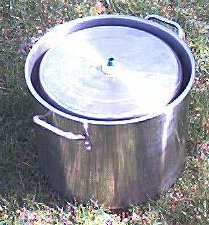
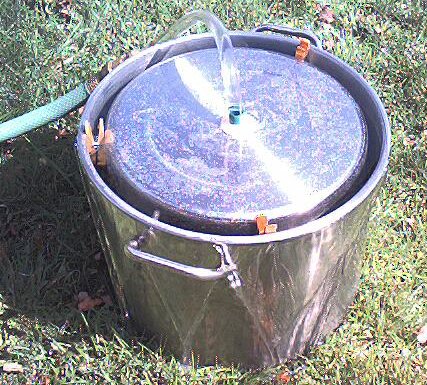
Assembled trap
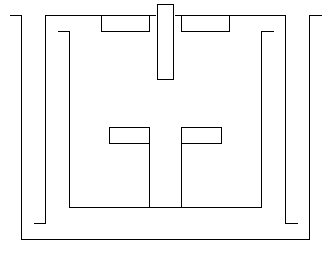
Here is a diagram of the cross section of the completed trap showing the three interlocked pots, the inlet/nozzle assembly and the two magnets (the x shaped piece in the bottom of the 16 inch pot is not shown for clarity):
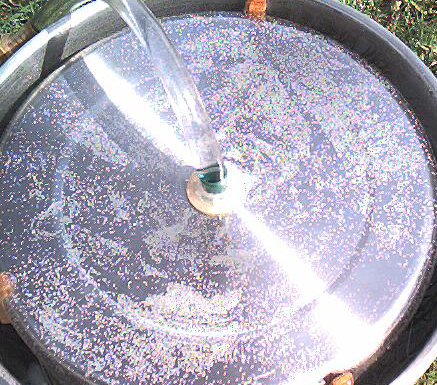
Shows clothspins and air bubbling out of inverted 12 quart pot
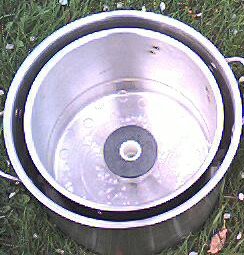
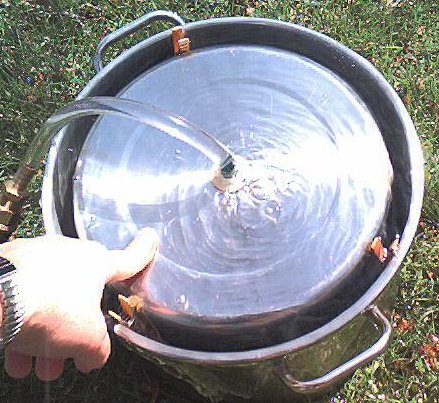
Here are a couple of views of the Storage Magnetic Trap in operation:
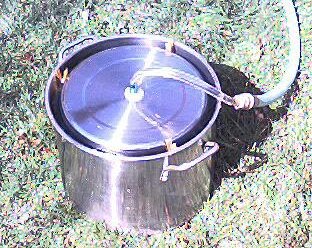
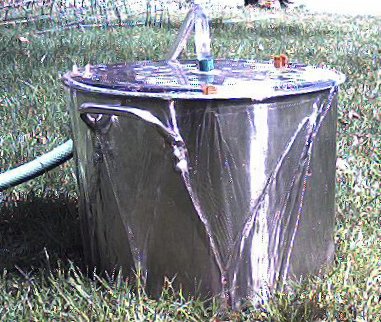
In the following two pictures notice the bubbles clinging to the bottom of the inverted 12 quart stock pot. These bubbles will remain stable for a long time after the water is shut off. The second picture was taken half an hour after the water was shut off.
Change the length of time the water flows through the device.
Change the swirl rate by constructing different nozzle sizes and configurations.
Assorted nozzel configurations
Change the swirl direction.
Change magnetic polarity. There are four possible magnetic field combinations between the adjoining faces of the two magnets: North-south, north-north, south-south, and south-north.
Experiment with inflow and outflow rate.
Experiment with circuitous outflow paths.
Experiment with galvanized pipe as the inflow tube.
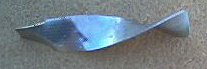
Try a stainless steel or plastic "twisted ribbon" type device to swirl the input water as it passes the top magnet on its way in.